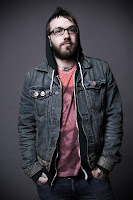
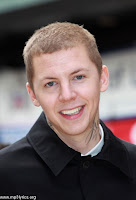
This was basically the same technique as the animal faces. Below is the first image I took of Kings Of Leon, along with the other people I wanted to use for the faces.


1. I took the first image of the Kings Of Leon and opened it in high quality in Photoshop. I made the size of the Photoshop template original A4, the most common magazine cover size. I then proceeded to cut around the inside of the faces, sometimes leaving the hair. After I was happy with the cut-outs, using the pen tool to select, I deleted the faces from the original image and pasted the new face on a new layer. Using the transform tool I fitted the face into place, over the top of the original image. I then used the rubber tool at a low opacity to remove the unwanted access image. I often had to try new faces and new positions to make the heads fit, as you can see below, I used three or four different people until I settled on the one I felt best suited the body. (Look at the guy on the right, in the waistcoat).
(Image #1 was the final image I went with, they all have their original hair just with new faces except for the guy in the waistcoat, I felt keeping the old hair didn't really fit anybody else, so I had to remove it. I used the third guys hair and face. This was the same technique, it just meant not removing the hair with the rubber tool.)
(Image #2 was a first attempt, as you can see the face looked mishaped and just ugly. I tried to keep the original hair and it really didn't work. The first two guys suited the body perfectly, but the third guy was tricky to find a suitable replacement. I had to experiment with many faces, but the one below did not work.)
(Image #3 is the original guy in the waistcoat, as you can see, obviously it fits perfectly. Due to the strange parting in his hair it was hard to find a face I could replace it with, I original tried looking for bald people with large forheads so it would be easier to paste the hair ontop. This didn't work, and as said above, I ended up removing his face and hair, and just using the replacements hair, it fitted better, although everyone else has the same original hair, just different faces.)
(Image #4, this is the final image I saved as a .png for my magazine cover, as you can see the first guy has the same hair, as does the second and forth. I had to use a shadow effect on the side of the first guys face to make it flow with the neck. I also decided to make the whole image black and white, that way I only had to adjust the brightness and contrast rather than colour correction. I think the first and last guys face is a bit out of contract, but it's not too noticeable and it's the best I could get it. Some work you can't see if the forth guy. Unfortunately I cut him out a bit in the print screens below, but the guy who's face I used had a neck tattoo, I thought this tattoo was so prominent I decided to keep it. I kept the original guys neck, but just pasted the new neck on top, using the rubber tool again, I removed the new neck, leaving just the area of the tattoo. I then changed the contrast in order for it to look natural, then once in place, and the right contrast and brightness, I merged the layers together.


No comments:
Post a Comment